Messy Bun Tutorial Ultimate Guide for Beginners 2024
The messy bun has become a staple hairstyle for many, celebrated for its effortless charm and versatility.
This casually elegant updo has gained popularity due to its ability to adapt to a wide range of settings, from lazy days at home to chic outings.

Perfect for both casual and semi-formal occasions, the messy bun can effortlessly elevate your look, making it suitable for a day at the office or a relaxed brunch with friends.
Its versatility lies in its ability to perfectly balance ease and style, ensuring you remain looking put-together while embracing a carefree vibe.
Types of Messy Bun
The messy bun is a versatile hairstyle that can be adapted in numerous ways to suit different occasions and personal styles. Here are some popular variations:
1. High Messy Bun
This style sits atop the head, giving an impression of height and elegance. It’s perfect for a casual day out or a more formal event, depending on how it’s accessorized.
To achieve this, gather your hair as if pulling it into a ponytail at the crown, then create a bun, ensuring it’s slightly loose for that desired messy effect.

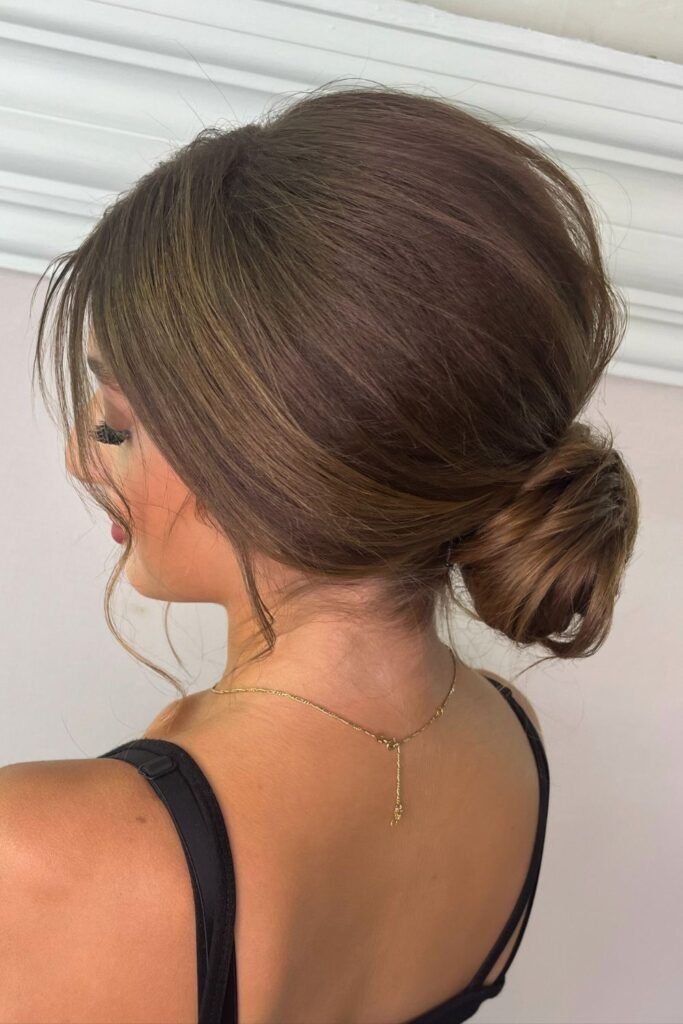
2. Low Messy Bun
Positioned at the nape of the neck, the low messy bun offers a more relaxed and understated look.
It’s ideal for laid-back settings or when you want a chic yet simple style. To enhance its appeal, allow some face-framing strands to escape for a softer appearance.
3. Side Messy Bun
This variation is playful and trendy, sitting to one side of the head. It adds asymmetry to your hairstyle and works wonderfully for both day and evening events.
Create the bun just below the ear, and secure it loosely for that carefree charm.

Step By Step Method to Do A Messy Bun Hairstyle
Materials Needed
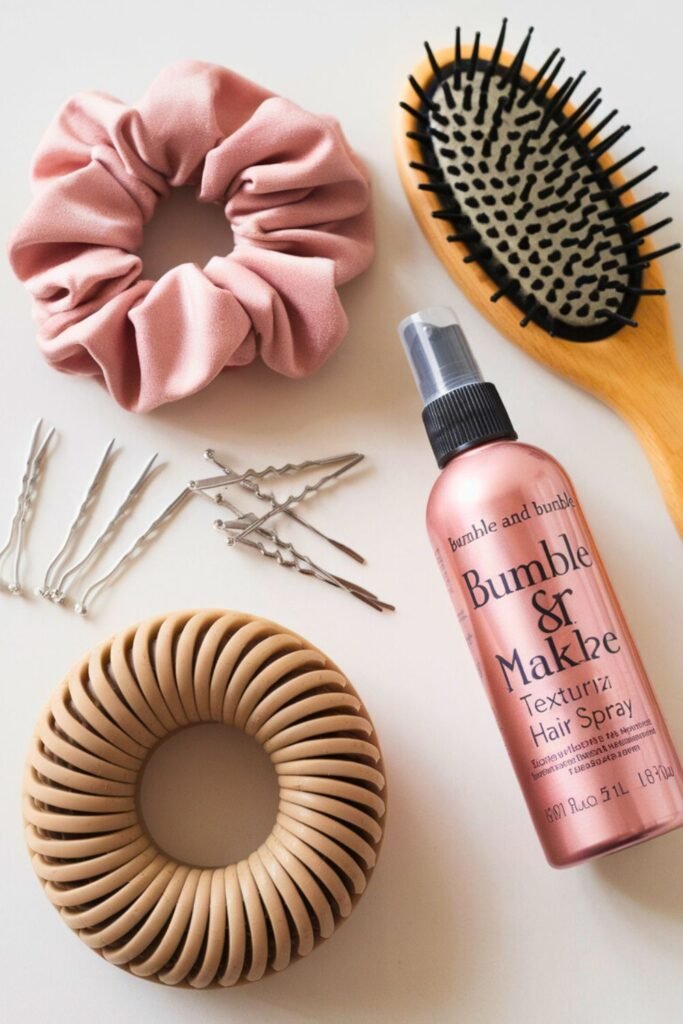
To create the perfect messy bun, you will need a few basic tools and products. Here’s a handy list to gather before you start:
- Hair Tie: Essential for securing the bun in place.
- Bobby Pins: Useful for tucking in loose strands and ensuring the bun holds its shape.
- Hairbrush: Aids in smoothing out tangles before starting the bun.
- Texturizing Spray: Adds volume and grip, making it easier to style and maintain the bun.
- Optional: Hair Spray: Provides extra hold for a long-lasting look.
- Optional: Hair Donut or Bun Maker: Can be used to add volume and structure to your bun.
Step 1: Preparation
Begin by thoroughly brushing or finger-combing your hair to remove any tangles or knots.
This will ensure that your hair is smooth and manageable before you start creating your messy bun.
If your hair is naturally smooth or lacks texture, it can be helpful to add a texturizing spray.

Lightly mist your hair with the spray to add volume and grip, which will help your bun stay in place and give it a fuller appearance.
Moreover, if you prefer a more tousled look, consider scrunching your hair gently to enhance its natural texture.
Step 2: Create the Ponytail
To create the foundation of your messy bun, gather all your hair into a ponytail. You can use your fingers or a hairbrush to sweep your hair back.
The positioning of your ponytail is crucial as it dictates where your bun will sit. For a casual, everyday look, position the ponytail at the back of your head.

If you’re aiming for a trendy top-knot style, gather your hair towards the crown or even slightly higher.
Secure the ponytail with a hair tie, ensuring it is tight enough to hold but not so tight that it causes discomfort. Adjust the height and placement based on your personal preference and the occasion.
Step 3: Form the Bun
With your ponytail secured, it’s time to form the bun. To create a classic messy bun, start by twisting the ponytail around itself.

As you twist, the hair will naturally coil into a bun shape. Depending on the length and volume of your hair, continue twisting until you’ve wrapped the entire ponytail.

Alternatively, you can loop the ponytail into a bun by folding it over and wrapping it around the base. Once you’re satisfied with the shape and size of your bun, use bobby pins to secure it in place.

Insert the pins strategically around the bun to hold it without flattening its shape. If you prefer using an elastic, carefully loop it over the bun to keep it secure.
Remember to maintain some looseness to preserve the bun’s messy aesthetic. Adjust stray strands as desired to perfect the look.
Step 4: Add Volume
To add volume and achieve that coveted messy look, gently pull on small sections of your bun, starting from the center and working outward.
Use your fingertips to softly tease the hair, creating a fuller appearance without disrupting the overall shape. Be careful not to tug too hard, as this could cause the bun to unravel.

If you want additional volume, you can slightly loosen the hair at the crown or sides of your head by gently running your fingers underneath and lifting the hair.
This creates a relaxed, effortless style and enhances the overall look. Adjust the strands as needed to balance the volume and messy aesthetic to your liking.
Step 5: Finishing Touches
Once you’re satisfied with the volume and shape of your bun, it’s time to focus on the finishing touches.
Begin by checking in a mirror to ensure that your bun is balanced and any stray hairs or flyaways are in place. Use a fine-tooth comb or your fingers to smooth out or tease sections as needed.
For a more polished finish, consider using hairspray or a texturizing spray to set your style. Hold the spray about 10-12 inches from your hair to evenly distribute the product without making the hair stiff.
If you prefer a more undone look, you can apply a small amount of styling cream or wax to your fingers and gently tousle the sections you want to emphasize.
These products will help maintain the bun’s structure and keep it looking fresh throughout the day.
Finish by checking the security of your pins or elastic, making sure the bun is comfortably held in place. Adjust any remaining loose strands to complete your desired look.
Tips for Accessorizing
Enhance your messy bun by adding accessories that reflect your personal style:
- Hair Pins and Clips: Use decorative bobby pins or clips to add a touch of glamour. Arrange them symmetrically or in a scattered pattern for a creative twist.
- Scarves and Headbands: Tie a colorful scarf or headband around the base of the bun to bring in a pop of color and texture. It’s a great way to match your outfit or add visual interest.
- Flowers and Hair Vines: Perfect for weddings or garden parties, small flowers or delicate hair vines woven into the bun lend a whimsical and romantic touch.
Conclusion
The messy bun is a versatile and adaptable hairstyle that offers a perfect blend of style and ease.
Its inherent charm lies in its ability to suit different textures, lengths, and types of hair, making it a go-to choice for a wide range of individuals.
Whether you prefer a high bun for a polished look or a low messy bun for a more casual vibe, there is a messy bun variation that complements any occasion.
By experimenting with accessories like hair pins, scarves, or flowers, you can effortlessly elevate your messy bun to express your personal style.

Hi, I am Michelle Phillips who loves to be inspired by modern beauty & fashion trends. That’s why I created this website to share latest fashion trends.
You, will find hairstyles, nails designs, makeup looks and hair color ideas here. So, let’s follow us on Pinterest to become a part of Fashion Trend Hacks community.


